Account Set up
In a company, you can set up multiple accounts based on brands, geographical locations, etc. Let’s consider a parent company, ABC Corp., which has multiple brands. Each brand could have an account to pursue specific advertising and marketing objectives under ABC Corp.
To go to Accounts, follow these steps:
- Go to the ReBid ADP Homepage
- Click Settings on the navigation bar on the left.
- Select Accounts
On the Accounts page, you can view all existing accounts for a company. First, add a new account by following these steps:
- On the Account details page, click New Account
2. On the new Account Details page, fill out the following sections: General Information, Account Contact, Billing Information, and Advanced Features.
General Information
In this section, add the following information associated with the account:
- ID: Account ID is auto-generated when the form is filled out and the user clicks Save
- Account Name: The name of the Account
- Contact Email: Primary Contact Email of the account
Account Contact
In this section, you can fill out details of the contact person: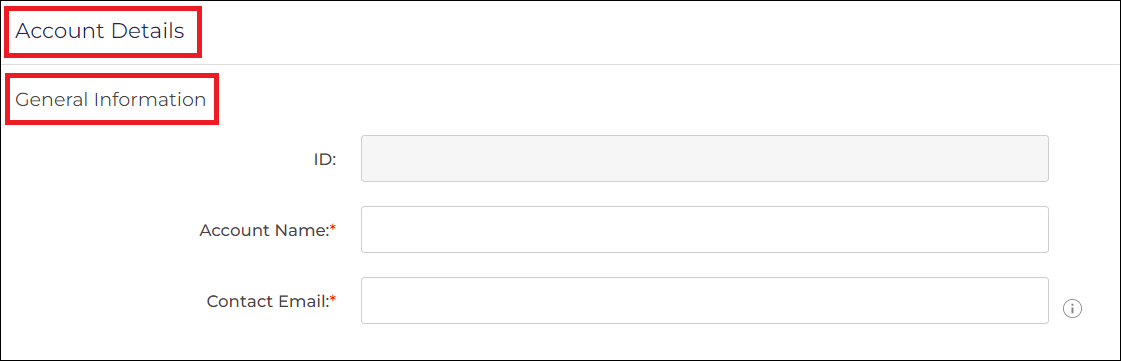
- Full Name: Full name of the contact person.
- Phone: Phone number of the contact person.
Billing Information
In this section, you have to fill out the Billing details:
- Checkbox: to indicate the Billing Contact is the same as the Account Contact
- Billing email: Email address for the billing
- Billing contact: Contact name of the billing
- Billing phone: Contact number of the billing
- Address 1: Line 1 of the billing address
- Address 2: Line 2 of the billing address
- City/Town: City or town name
- State/Province: State or Province name
- Postal code: Zip or Pin code
- Country: Country name
- Billing notes: Billing notes, if any, for future reference
Advanced Features
This section supports advanced features to manage data and campaign reviews. It includes:
- Data Management Settings(Insights): Primarily used to track end-to-end customer journey. When enabled, ReBid Insight tracks user information on a web page.
- Other Settings (Campaign Review): When enabled, an admin must approve a campaign before it goes live.
After filling out the required information, you may click Save to continue or Cancel to make further changes.
Similarly, you can add multiple accounts. Now, go back to the Accounts page and click on Select Account to view the details of that account, along with its advertisers.
You can directly search for an account using Account name. You can also use filters like Billing Country and set the Status to Active or Inactive as per requirements to narrow down the search results.
In addition, you can also manage your Advertiser accounts using these options:
- Use Reports to view the performance of the selected account for different data ranges such as Last 7 Days, Last 30 Days, This Month, Last Month, Last 90 Days, and Custom Range
- Use Edit (pencil icon) to easily edit the Account details
- Use Delete to remove the account
Click on the desired account to view the Account details page, which lists all the Advertisers associated with the account.